So you’ve got your own personal Git use dialled in, you’ve got a server environment configured with commits flying into your project like crazy, now you’re ready to start leveraging the power of Git with others. New workflows exist for distributed version control systems that offer big gains in terms of developer workflow, interaction, quality assurance and overall delivery process. Let’s take a look at one of them – GitFlow, so we can turn your team’s Git usage up to 11.
Workflows
One of the problems that comes from using source control in a team of any more than just a few developers is common regardless of the tooling you use: Developers editing the same files and working on the same projects and treading on each others toes. It’s a recipe for disaster.
Every Source Control tooling I've used over the years has had a different community approach to how this issue is dealt with; an informal “gold standard” for branching and merging. The Git community’s most common answer to this is an approach/workflow named “GitFlow”.
In essence GitFlow is a branching strategy that takes the best bits from a number of very successful strategies from CVS communities (SVN/TFS) and mashes them together.
A really good early write up of using GitFlow can be found here.
Foundations
At it’s core GitFlow uses the speed, simplicity and power of Git’s branching and merging features to take full advantage of this for your team’s betterment.
It operates on a few key principles and assumptions.
- Commits are cheap.
- Branches are cheap.
- Merging in Git is so super pain free, so this works well for code reviews/peer review.
- Teams need an approach to building features away from production code.
- Teams need an approach to rolling out hotfixes without mixing in any untested development code.
- Having a way to record previous releases is an important way of story workflow progression (tagging).
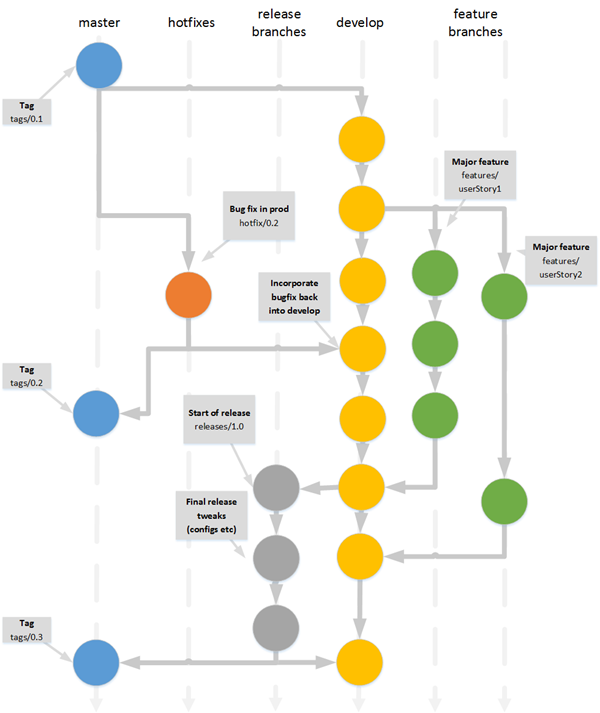
At a high level, GitFlow is the use of Git’s branching strategy to take care of a need for hotfixes, releases, development and team feature branches.
This translates directly into the following:
“master” branch
Your current latest production ready codebase at any time resides in the “master” branch. This is only merged into once a release has successfully gone out and is tagged for easy rollback.
“develop” branch
Your “develop” branch is your currently integrated work in progress branch. If you’re deploying your staging or pre-prod integration codebase from here, you’re probably doing it right :-)
Feature branches for everything
Branching in Git is cheap in terms of speed and disk space - mostly because it’s not how you’d normally think of branching. Merging is super easy and mostly merge conflict free. So every time you pick up a new user story or backlog item, create a new branch.
Release branching is used for pre-release tweaks/integration
It’s not rare for you to work towards a release and have to make some last minute tweaks against your highly integrated “develop” codebase. For this we create a branch of “develop” and use it to pre-merge “master” into it resolving any last minute kinks while allowing your team to carry on.
Support to work on hotfixes as a first class citizen
Someone’s reported a sev 1/critical/end-of-world-drop-everything bug, and you need to just tweak something quickly to resolve it. Branching off master for a hotfix before a quick reintegration and double merge back into “master” and “develop” makes this easy.
Tagging to remember all of your teams greatest hits
Tagging releases with semantic versioning conventions make rolling back a piece of cake.
Down to Business
Whether you’re in the command line, or using the SourceTree GUI, implementing GitFlow is easy. SourceTree actually makes this even easier by supporting GitFlow natively with an easy to use wrapper over the top of the Git commands necessary for it’s use. Want a new feature? Simply use the button just for that!
Working on code away from the current release
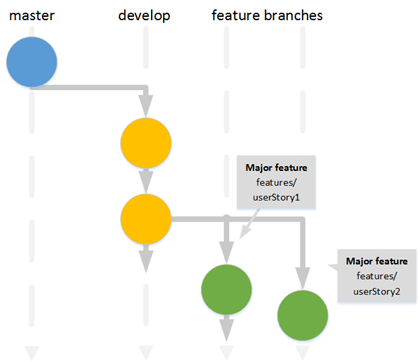
The first thing any team wants to ensure is that you’ve got a stable working copy of your source code to deploy at the drop of a hat while you continue working.
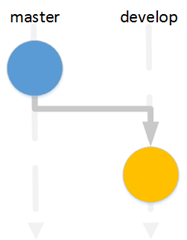
The way GitFlow approaches this is with two standard branches.
The “master” branch is where we keep our stable source codebase. Our current releases.
We then create a branch called “develop” to store your current development integration branch. If you like to run Continuous Integration and Deployment for your team’s current stable development work then this might be where you’d do it.
To set this up in the command prompt or with your Git bash:
$ git checkout master
$ git checkout -b develop
This checks out your current master branch and then branches it into a new branch named “develop” for you to continue your work in.
To get this some setup in Source Tree while also letting Source Tree know that you want to use GitFlow:
Open Source Tree with your current Repository open.
Click on the “GitFlow” icon:
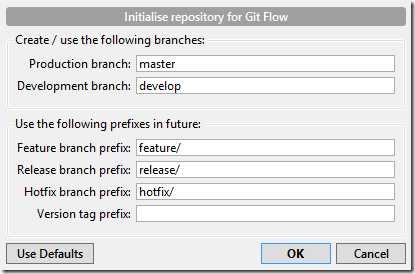
This will then bring up a dialog asking you what defaults you’d like to use for your branch naming conventions. I suggest just going with the defaults.
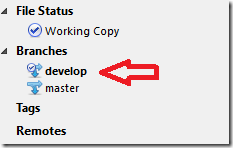
Press OK, and Source Tree will create you a new “develop” branch and check it out.
If you open up your .git folder and look closely you’ll notice that SourceTree has also edited your “.git\config” file to add your GitFlow configuration (I’ve highlighted the new bits in red).
[core]
    repositoryformatversion = 0
    filemode = false
    bare = false
    logallrefupdates = true
    symlinks = false
    ignorecase = true
    hideDotFiles = dotGitOnly
[gitflow "branch"]
    master = master
    develop = develop
[gitflow "prefix"]
    feature = feature/
    release = release/
    hotfix = hotfix/
    support = support/
    versiontag =
With this completed you’re now ready to get going using GitFlow with SourceTree.
You then want to make sure you push this new “develop” branch up to your remote so your team can see it. By default this won’t occur, so we need to make sure your remote knows about the branch.
On the command line:
$ git push origin feature/user-story-123
In Source Tree you simply press the “Push” icon, and make sure you’ve checked your new develop branch.
Separate the different pieces of work you and your team are developing
I mentioned above that Git was great because commits and branches are so cheap. This makes working in parallel really easy as everyone can work with their own branch.
GitFlow gives you a framework for taking this even further, and guiding you to use a new branch for every new piece of work – by creating “feature” branches.
To follow this convention, every time you want to work on something new, checkout your develop branch, and then branch from it.
$ git checkout develop
$ git checkout -b feature/user-story-123
Protip: if you’re big into using GitFlow on the commandline, there is actually a set of bash extensions that make this more implicit. Give them a go to save yourself the keystrokes.
If you’re using Source Tree you do this by checking out your “develop” branch (right click on it and choose “checkout”).
Then press the GitFlow icon and select “start new feature”
Then give your feature a name, hit OK and you’ve created a new feature branch and checked it out.
After you’ve done some work you need to make sure you push this new branch to your remote so your team can see it and potentially work on it also.
On the command line:
$ git push origin feature/user-story-123
In Source Tree you do this the same way you did with your develop branch, press the “Push” icon and select your new feature branch.
Many commits later you’ve finished your work.
You’re ready to close out your feature and merge it back into “develop”.
We need to merge your feature branch into “develop”
On the command line:
$ git checkout develop
$ git merge feature/user-story-123
$ git branch –d feature/user-story-123
This merges“develop” into your feature, then checks out “develop” and merges your feature into develop, then deletes develop.
If you suffer from a merge conflict on the command line, i recommend this guide to help walk you through an interactive command line merge.
In Source Tree:
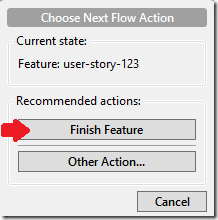
Click on the GitFlow icon.
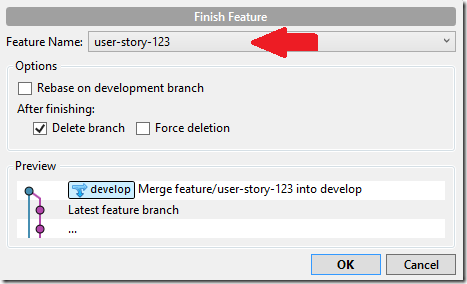
Then press “Finish feature”.
You can then select the feature branch you’d like to finalise and click OK.
Both of the above use cases will take the Git default of conducting a “fast forward” merge if possible, which can be a little unsettling if you’ve never used Git before. This is because depending on what’s gone on in the “develop” since you branched, any visibility over what went on in your feature branch may disappear with your merge and appear like the work was done in “develop” all along. In the case that nothing has changed since you branched, your feature branch has now become the past for the “develop” branch. You can change this behaviour, but have a read so you understand whether this matters to you or not.
In the case that you encounter a merge conflict because your team has made changes to “develop” while you were working, you can follow this guide to help you work through a merge conflict with Source Tree and Git (hint; it’s quite easy).
You’ve now completed your first feature branch using GitFlow. This allows each of your team to work on separate pieces of functionality without affecting each other while at the same time keeping a clean development integration copy of your team’s work in progress and your current production release of code for a redeployment or rollback at anytime.
Starting a new Release and segregating it so work can carry on
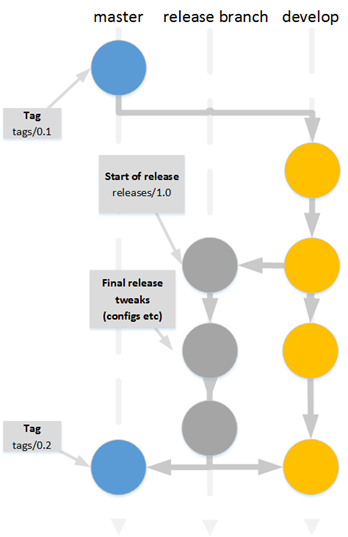
Another important team productivity boost from GitFlow is it’s ability for you to “work on a release” while normal development work continues in “develop” and your feature branches. It does this by taking a branch of your current “develop” branch named “releases/0.1” (following semantic versioning conventions). This allow your team to continue working while some of your team or DevOps guys finalise your release.
To accomplish this what we’re going to do:
- Checkout “develop”
- Branch “develop” into “release/0.1”
- Make some last minute changes.
- Merge “release/0.1” into master and “develop”.
- Delete our release branch.
To do this on the command line:
$ git checkout develop
$ git checkout -b release/v0.1
Now make any commits you need to finalise your release.
When you’re done, it’s time to merge into “master” and “develop”, and tag your release on the command line.
$ git checkout develop
$ git merge release/v0.1
$ git checkout master
$ git merge release/v0.1
$ git tag -a v0.1 -m 'Our release of version v0.1'
$ git branch –d release/v0.1
To do this in Source Tree:
Checkout your “develop” branch by right clicking on “develop” and selecting “checkout “develop branch”.
Now click on the “GitFlow” icon.
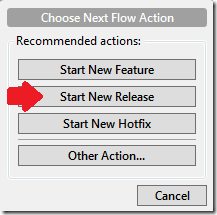
Now press the “Start New Release” button.
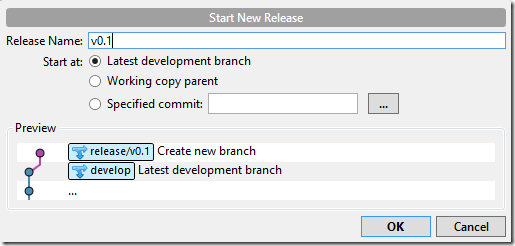
Give your release a name. I’m naming mine “v0.1” as it’s my first release.
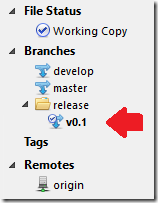
You are now checked out into your new release branch.
You can then make any final changes and commits, while your team keeps working on the next one.
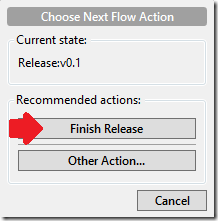
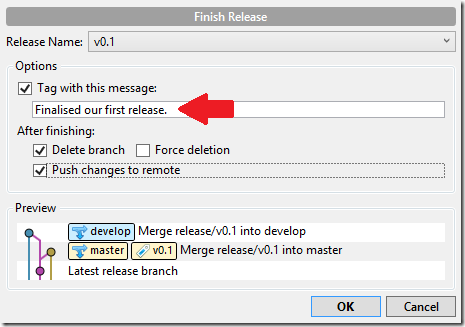
When you are done with your release changes, you finish your release by again pressing the GitFlow icon.
Press the “Finish Release” button.
Enter a comment for your release finalisation message and press OK.
And with that you’ve finished your first release!
Fixing production issues without stopping the music
The last thing that most teams need from a great source control workflow is the ability to take into account out-of-band hotfixes for bugs found in production.
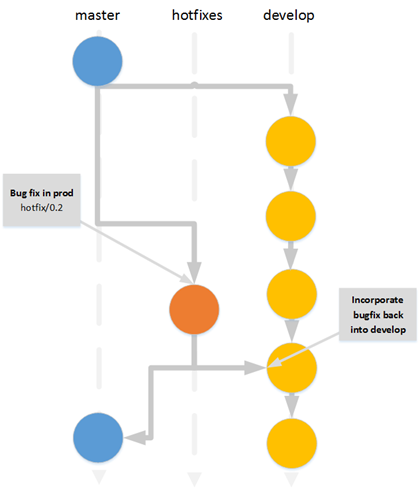
GitFlow has you covered here, as it includes a branching strategy for hotfixes. This is incredibly important because a hotfix to production is usually a small tweak, and you want to make it only to your current production codebase while keeping it very segregated from unstable changes happening elsewhere in your repository. By using GitFlow to create a branch of “master” specifically to work on this fix, you allow your team to continue on it’s work in “develop” or feature branches without slowing them down at all – all while being incredibly safe.
What this means in reality:
- Your team finds a bug in production.
- You create a branch of “master” named “hotfix/v0.1.1” or similar.
- Your team completes a fix by committing to this branch.
- You merge this hotfix branch back into “master” and “develop” and delete the release branch.
- You tag this merged commit for later rollback.
Doing this on the command line:
$ git checkout master
$ git checkout -b hotfix/v0.1.1
Now make any commits you need to finalise your hotfix.
These commits will be kept separate from everything else going on in your repo.
When completed with your hotfix, it’s time to merge it into “master” and “develop” and delete it.
$ git checkout master
$ git merge hotfix/v0.1.1
$ git checkout developer
$ git merge hotfix/v0.1.1
$ git tag -a v0.1.1 -m 'Fix a cross browser compatibility issue on homepage'
$ git branch -d hotfix/v0.1.1
Doing this in Source Tree:
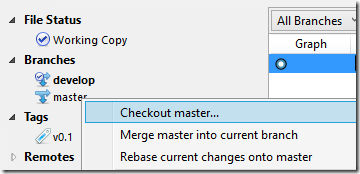
Checkout your “master” branch by right clicking on it on the left and opting the “Checkout master”
Now press the “GitFlow” icon to open the GitFlow menu.
Select the option for “Start New Hotfix”
Give your hotfix a name.
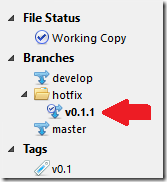
You’ll notice that Source Tree gives your branch the name “hotfix/v0.1.1” to follow the GitFlow naming convention.
Then work with and commit your fixes to this branch.
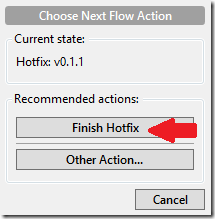
When you’re done we’ll finish the hotfix, by pressing the GitFlow icon again and then selecting “Finish HotFix”
Now enter a description for your closing merge, and press OK.
When you action this merge you’ll notice that Source Tree has also tagged your hotfix release with the name of your hotfix.
And with that you’ve also taken care of fixing a bug in production while your team continues to work.
Summary
I hope the last 4 parts of this blog series helped you get a start using Git with other people in your team. Like a lot of new development team approaches I wouldn’t expect you to all be Git Gurus on day one, but I hope these posts are enough to get you and your team started.
Checkout the rest of the posts in this series:
- Part 1: Getting started
- Part 2: Pushing it up Somewhere
- Part 3: More than just Committing
- Part 4: Team Workflows











Comments