TeamCity is one of the greatest tools to hit the Continuous Integration world, with free licensing for 20 build configurations and an easy to use interface it ticks all the right boxes (not to mention ease of use for Windows Users) – but once you splash out on an Enterprise license and grow your installation to house many build configurations you start to want more power, and this is when a second build agent is your ticket to freedom.
 At my workplace all projects that we develop require compulsory continuous delivery. Our staging environments auto deploy on check-in and our live environments have only ever been deployed to by our build server not direct from a users machine (they are executed manually) – this way our team always know that deployment day is a walk in the park, and there is no stress or tension when deploying a new feature.
If you have read my posts on CI in the past, you’ll know that Continuous Integration and Continuous Delivery are both something i am very passionate in my support of.
So much so that my workplace’s love for CI and CD has meant that we have over 100 build configurations on our TeamCity server. Our team members will be working on any number of different projects at the same time, and as a result we have multiple projects deploying as part of our Continuous Delivery setup all the time and often at the same time – this can lead to a little friction, as developers can be forced to wait for their project to make it to the front of the build queue.
So what is the solution? It’s quite simple:
Moar Buildseseseses
The answer is to have multiple build agents so that you can run more than one build at a time.
JetBrains in their usual fashion have made the licensing for TeamCity simple and easy to understand when it comes to additional build agents – at the time this article was written, both FREE Professional version and the Enterprise version allow for 3 build agents included in their licenses.
This means that even with the FREE version, you can take over the world with your CI awesomeness!
After finding this out you may be a little disheartened if you run your build server on window though, as the installer for the TeamCity build agent only supports a single instance per server. With modern hardware, even the most minimal/shoved-in-a-back-cupboard/rebuilt-from-your-sisters-old-school-computer servers have more than enough resources to handle multiple build agent instances.
For non-Windows installations, running multiple build agents on a single machine is quite simple, and JetBrains lists how to do it – the Windows section of this how to relies on you not using an installer though.
There is a solution though, so “Cheer up Emo Kid” – You can install multiple TeamCity Build Agents on a single Windows installation.
Anatomy of a TeamCity Build Agent
TeamCity’s build agent is a single EXE file that runs as a service (it is located at [build agent directory]/launcher/bin/TeamCityAgentService-windows-x86-32.exe).
The build agent on start up opens a listening port as defined in a configuration file (located at [build agent directory]/conf/buildAgent.properties) The default port for this is 9090.
It then contacts it’s nominated TeamCity server (again stored in the above config file), and registers as a build agent (the default name for this agent is the hostname of the server it is installed on).
The Windows installation of TeamCity’s build agent is quite modular. Below is a screenshot of the Build Agent’s root folder:
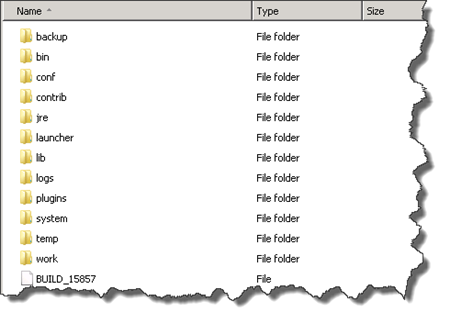
A quick break down of the folders you’ll want to know about (some of the information below are conclusions made based on digging around, others are from information found on the interwebs):
/bin
Contains all the service control batch files (start service, stop service, install service etc etc)
/conf
Contains all the agent’s configuration files/details such as the agents name, its listening port and the address of it’s server.
/launcher
Contains all the service’s application files. The bin folder of this actually has all versions of the service not just the Windows one (Solaris, Mac etc)
/logs
Not too hard to guess…
/plugins
Contains all the Build agents plugins. This includes all the build runners and source control modules.
/temp
Contains build task temporary files (actual build run tasks – not artefacts of checked out files
/work
Contains configuration that points at the storage locations of currently running builds (in a file called directory.map).
Why do you care about all the above? You care because they unlock the ability to install more than one agent at a time!
Installing a Second Build Agent on the same server
For my example I'll assume you are doing the below as a second installation, i.e. you have a server that already has TeamCity and a single Build Agent installed (if you don’t and need help, check out my previous post on Automated Deployments with TeamCity).
On your TeamCity server Download the latest build agent installer by visiting the Agents tab of your installation and clicking the Install Build Agent link in the top right corner of the page. When you have downloaded the MS Windows Installer, run it.
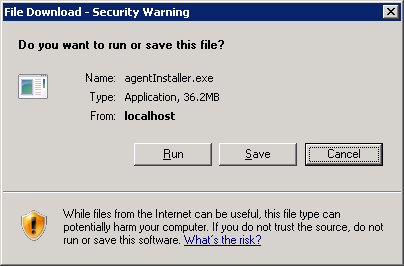
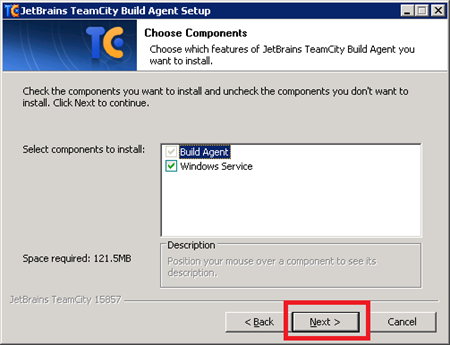
When selecting what to install, stick with the default and install everything by clicking Next
When entering the installation directory, enter a New directory name. Make sure this is not the same as your initial build agent installation directory.
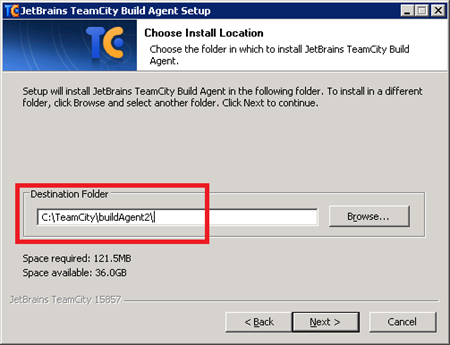
Click Next and wait for the build agent’s files to be installed in the directory you entered above.
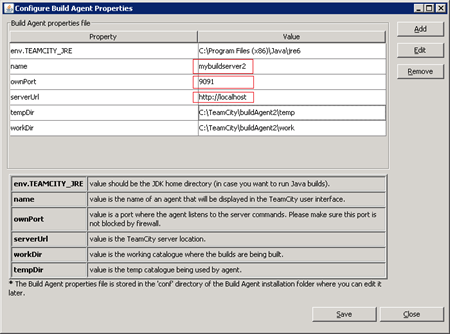
When complete this will bring up a configuration window.
In this window you want to:
- Enter a name for your build agent THIS MUST BE DIFFERENT FROM THE BUILD AGENT YOU ALREADY HAVE INSTALLED
- Enter a port for your agent to listen on THIS MUST BE DIFFERENT FROM THE BUILD AGENT YOU ALREADY HAVE INSTALLED
- Enter the server URL for your TeamCity server – this is http://localhost if you are hosting the agent on the same server as TeamCity
STOP!!!!!!
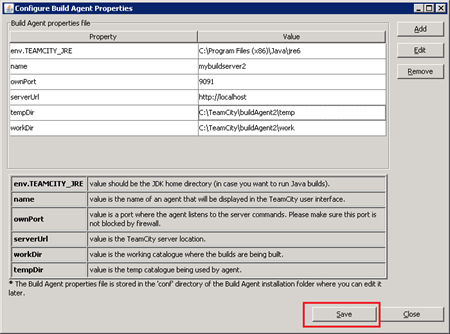
You must complete some manual changes to the configuration files of your new build agent before continuing with the installation. If you click Save button without making them, you will break both your newly installed and old build agents and have to start from scratch. You have been warned!
A note about continuing (DO NOT DO THIS YET)
The second you click the Save button, and then click Next, the installer runs a batch file to register the build agent EXE as a service – it uses a bunch of configuration settings in the file we are about to edit to complete this. What we need to do is change these configuration settings so that when the service gets registered it installs as a Second Service instead of just installing over the top of your first build agent.
Configuration Changes
Open Notepad as Administrator
Open the file [BuildAgentDirectory]\launcher\conf\wrapper.conf
Find the line that reads
# Name of the service
wrapper.ntservice.name=TCBuildAgent
And change the settings entries to something unique
# Name of the service
wrapper.ntservice.name=TCBuildAgent2
Do the same for the following entries
# Title to use when running as a console
wrapper.console.title=TeamCity Build Agent

# Display name of the service
wrapper.ntservice.displayname=TeamCity Build Agent Service

# Description of the service
wrapper.ntservice.description=TeamCity Build Agent Service
An example of the values after being altered:
# Title to use when running as a console
wrapper.console.title=TeamCity Build Agent 2

# Display name of the service
wrapper.ntservice.displayname=TeamCity Build Agent Service 2

# Description of the service
wrapper.ntservice.description=TeamCity Build Agent Service 2
Now switch back to your installation window and click Save at the settings pane.
Back in the installer window Click Next (this will install and register the service using the settings we entered above.
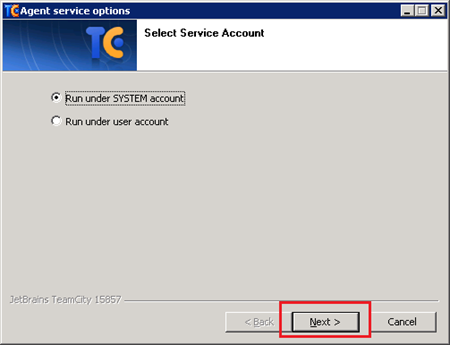
Now click Next again to start your new build agent
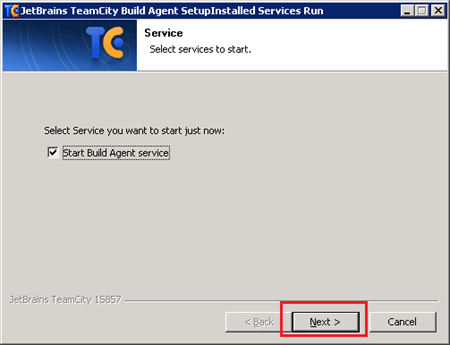
Click Finish
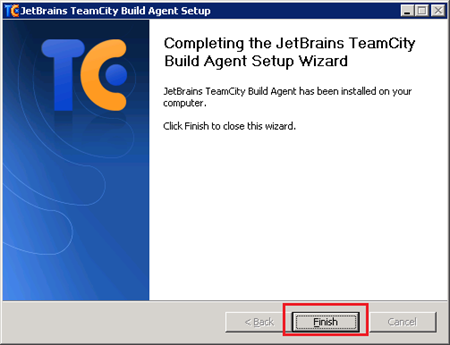
And you are done!
Time to go get yourself a <insert beverage of choice> to celebrate your new multiple-build-agent glory.
Where to from here?
There are a few gotcha’s that i have experienced when first moving to having multiple build agents, and they are unrelated to “hacking” this installation process but are just par-for-the-course when working with multiple build agents on a single machine. Either way, you should make yourself aware;
Multiple Builds Running Concurrently
The out of the box configuration for a TeamCity build configuration allows for unlimited instances of a build config to run concurrently – when all your agents are on a single server you probably do not want this to happen, as they probably share the same source control and may also talk to 3rd part resources such as your integration testing environment so you don’t want multiple instances of this to run at the same time.
To turn this off, simply set the maximum concurrent build value on the first page of a build configuration’s Edit Configuration Settings page to 1
Different Build Configurations Sharing The Same VCS Checkout Folder
Another problem i have run into is where you have the same solution being built for multiple environments or being deployed to multiple environments and you have both configurations sharing the same source control check out directory. This causes the builds to hang while they both try to delete/download source/build source from the same folder at the same time.
To correct this, simply make sure all your build configurations use different VCS/source control check out directories. This is changed from the Version Control Settings page of your build configuration:

