Now that we're all configured at Amazon and we've got our solution in a state where we can easily package and deploy it's time to automate it all with TeamCity so you don't have to have any human intervention when you want to fire up a new instance of your website for testing.
This post is part 3 in a 3 part series.
- Part1: Amazon AWS configuration
- Part 2: Site Configuration and scripts
- Part 3: Automating it all with TeamCity
First smoke test
Before we start off using TeamCity, we should probably test that everything works locally first, so we're going to deploy, package and push and then start a new instance from our local machines.
We need to run through the process as if we were TeamCity. To start with run a deployment from within Visual Studio to create your webdeploy package.
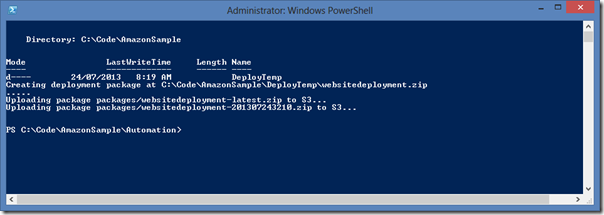
Now open a PowerShell console and CD into your .\Automation folder. Now run your PackageAndPublish.ps1 file.
This should show that your packages uploaded to Amazon S3 successfully.
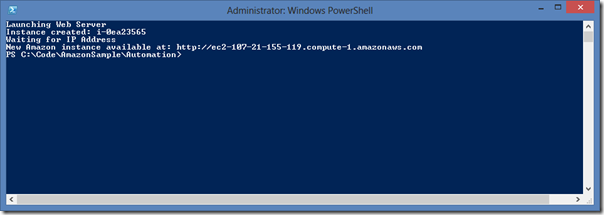
Now run the next script to automate the creation of Amazon instances – LaunchNewInstance.ps1
now wait a few minutes (usually about 10) and hit the URL mentioned in the PowerShell remote – your website should be there.
Setting up the Build
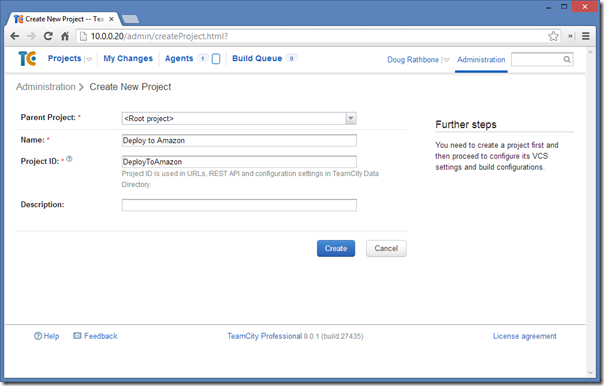
Now let’s swap over to TeamCity and create a new Build Project – I've named mine “Deploy to Amazon”.
Then create the first build configuration – this is called “Package and Publish to S3”.
Save this and move onto the next page.
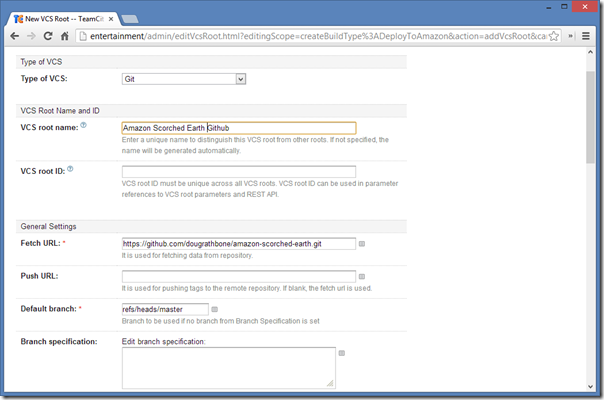
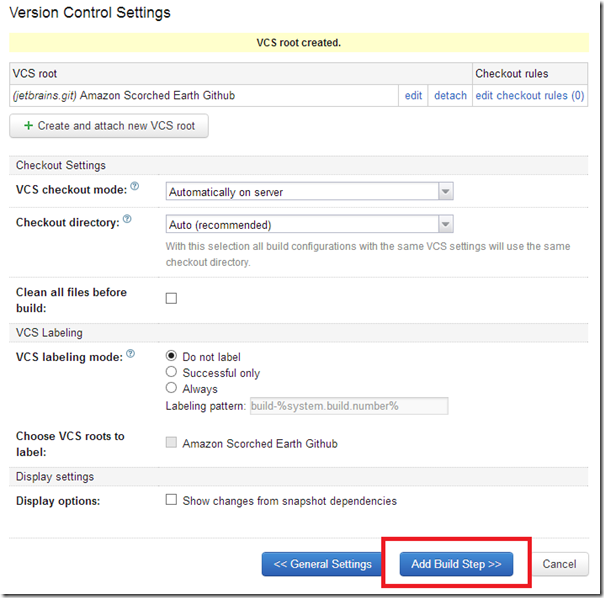
Attach a new source control repository and save.
Save and then Add a new Build step
Set your build step up with:
- Runner: MSBUILD
- Build file path: "Website\AmazonSampleApp.sln"
- MSBUILD Version: Microsoft .NET Framework 4.5
- MSBuild ToolsVersion: 4.0
- Targets: "Clean Rebuild"
- Command line options: /p:Configuration=Release;DeployOnBuild=True;PublishingProfile="Amazon"
Now add a second build step – we're going to make TeamCity execute our "PackageAndPublish.ps1" PowerShell script to upload the package to S3.
Enter the following:
- Runner type: Powershell
- Step name: Upload to Amazon
- Run mode version: 3.0
- Bitness: x86
- Script: File
- Script file: "automation\packageandpublish.ps1"
- Script execution mode: "Execute .ps1 script with "-File" argument"
Save this and add our final step – launching a new amazon instance.
- Runner type: Powershell
- Step name: "Launch new instance"
- Run mode version: 3.0
- Bitness: x86
- Script: File
- Script file: "automation\launchnewinstance.ps1"
- Script execution mode: "Execute .ps1 script with "-File" argument"
Save this final build step and save out of your build configuration.
What we've done here is automate:
- Pull from our source repo.
- Build the website and publish it using our publishing profile.
- Upload the Amazon S3 a copy of our package as well as a date delta to roll back to.
- Tell Amazon to start a new Ec2 Micro windows instance (you can make this a large instance by changing the script) and use our UserData to kick things off.
I haven't set up any build triggers for checkins etc, as this config involves all the steps – you may want to break the build steps into multiple configs and run it to suite your development workflow (maybe create a package on checkin, but only fire up a new machine deployment once a day?)
Now if you run your TeamCity build configuration and look in the log file you should see a message showing the hostname of your new server:
Launching Web Server
Instance created: i-0c268260
Waiting for IP Address
New Amazon instance available at: http://ec2-23-20-118-227.compute-1.amazonaws.com
10-15 minutes later, and you should see your website at the URL mentioned in the above log file.
Now go get yourself a tasty beverage in celebration!
Clone a copy of the code for reuse
A sanitized version of all of the code and scripts used in this blog post series can be found in the following Github repo.
Simply clone and insert your amazon creds and settings.
https://github.com/dougrathbone/amazon-scorched-earth
If at first you fail, try, try again
If you run your build and you're having problems, there are a few things you can do to investigate.
Ec2ConfigService Logs
This location is usually the first place I got to look as this is where Amazon themselves write their logs. When the server starts up and runs your UserData file, the script is run by a Windows service written by Amazon called the Ec2ConfigService. This service's log files are the place to look for anything untoward that occurred during the servers initialisation.
This is stored at C:\Program Files\Amazon\Ec2ConfigService\logs\Ec2ConfigLog.txt
Logs created through my script
Another place to look is the log file that I capture the results of my User Data script stored at C:\Data\AutomationLog.txt this will usually show you where you're going wrong with downloading the package, installing web deploy and the windows features etc.
Taking it one step further (or many)
Speeding up provision time
So you've seen above that each new server (or infrastructure deployment) takes around 10 – 15 minutes to come online, install the windows features, and then provision your website. Remember we're using an off the shelf Amazon provided Windows server 2012 image that has nothing installed (its also missing IIS and webdeploy so we need time to install those as well).
You can speed this up by imaging a windows server in a start state – usually with all of your services etc installed; you don't want your app to be there or any dependencies you want to deploy during the UserData script run, but you want to save that "lets install IIS and WebDeploy" time.
Read about that here.
Multi environment packages with Package-Web
Sayed Hashimi from the Visual Studio we team has a great open source project called Package-Web which allows you to package multiple web.config transforms with your WebDeploy package – and you can choose what transform to run at deploy time which is incredibly powerful if you want to create the above package, but have it self-deploy to either staging or production environments – then you get to keep a single package and promote it between environments.
Nuget> Package-Web
Multiple servers
The cool thing about running this all through a build script is that it's easy to play with – maybe you're using a cluster of servers, and you'd like to deploy 5 new machines to replace the 5 old ones. Simply modify our LaunchInstance.ps1 powershell script to lift the amount of servers to start and you're off and away.
Example modification to our LaunchInstance.ps1:
echo 'Launching Web Server'
$runRequest = new-object Amazon.EC2.Model.RunInstancesRequest
$runRequest.ImageId = $amiId
$runRequest.KeyName = $serverKey
$runRequest.MaxCount = "5"
$runRequest.MinCount = "5"
$runRequest.InstanceType = $instanceSize
$runRequest.SecurityGroupId = $securityGroup
$runRequest.UserData = $userDataContent
Tagging instances with build version
One cool feature of EC2 is the ability tag servers with labels for later identification. You can use this the label your servers with their build version so that later you can easily turn off old versions of your app by simply killing previous builds (you can easily do this as part of your powershell script).
Example of our modified LaunchInstance.ps1 script:
if($ip.Length -gt 0)
     {
        $newInstanceName = "$servername-$runResult"
        # We have an IP address


        $tag = New-Object Amazon.EC2.Model.Tag
        $tag.Key = "BuildVersion"
        $tag.Value = "1.00.1.3"
        echo "Attempting to tag instance with build version $newInstanceName"
        $createTagsRequest = New-Object Amazon.EC2.Model.CreateTagsRequest
        $createTagsRequest.WithResourceId($runResult)
        $createTagsRequest.WithTag($tag);
        $null = $client.CreateTags($createTagsRequest);
}
Email on completion
Another idea we've put to use at my workplace, is having each new instance send you an email when it's finished setting itself up – either to let you know it's alive and kicking, or to send you the log of what went wrong. This stops you having to dig through your TeamCity logs looking for the instance Url.
This entails:
- On UserData finishing, having the server visit the local site using a WebClient or similar.
- Having a page in your site that runs a "preflight" check like talking to the DB, any sharing data storage etc. (acceptance tests) and throwing an exception if not 100%.
- Have your UserData PowerShell respond to the Http status codes that the page returns and email your accordingly.
Load balancer addition on completion
I mentioned above that you can starting thinking about having the servers run some acceptance "preflight" tests (like talking to your DB, checking read/write access to any shared resources like S3) and then proceed to having it "add itself" to your Elastic Load balancer – this allows you to setup Autoscaling so that your cluster can automatically scale up if you're experiencing load.
Example:
Write-Host "Registering instance with the load balancer"

$elbConfig=New-Object Amazon.ElasticLoadBalancing.AmazonElasticLoadBalancingConfig
$elbConfig.ServiceURL = "HTTPS://elasticloadbalancing.us-east-1.amazonaws.com"

$elbClient=[Amazon.AWSClientFactory]::CreateAmazonElasticLoadBalancingClient($accessKeyID,$secretKeyID,$elbConfig)

$elbRequest = New-Object Amazon.ElasticLoadBalancing.Model.RegisterInstancesWithLoadBalancerRequest
$elbRequest.LoadBalancerName = "[name of load balancer]"

$instances = New-Object System.Collections.Generic.List[Amazon.ElasticLoadBalancing.Model.Instance]
$instance = New-Object Amazon.ElasticLoadBalancing.Model.Instance
$instance.InstanceId = $instanceId
$instances.add($instance)

$elbRequest.Instances = $instances
$elbResponse = $elbClient.RegisterInstancesWithLoadBalancer($elbRequest)
![image_thumb18_thumb[6] image_thumb18_thumb[6]](/asset/blogimages/22d55074-84f5-41d9-b4b8-514a685480ce_image_thumb18_thumb%5B6%5D_thumb.png)



![image_thumb[7] image_thumb[7]](/asset/blogimages/02bb1dbe-30b9-481c-97f6-8c739e49ac50_image_thumb%5B7%5D_thumb.png)
![image_thumb[9] image_thumb[9]](/asset/blogimages/48ed80b5-64f3-4c60-a0ba-1e08a4e795db_image_thumb%5B9%5D_thumb.png)
Comments