Over the last year I’ve gone crazy for some of the new automation tooling that developers have had made available to us to help setup continuous integration. The whole idea of infrastructure as code isn’t a new thing, the *nix crowd has had Chef and Puppet for years – last April Amazon added support for batch and PowerShell scripting on Windows EC2 instance initialisation, and this gives us the ability to do some pretty powerful server and website automation such as servers that initialise and install their own services and websites – potentially on command to fire up a new testing instance or automatically handle load.
Once we've run through using UserData, we can then move onto bigger things in the Amazon stack such as Cloud Formation and OpsWorks – both extremely powerful pieces of automation tooling; with Windows supported out of the box.
This post is part 1 in a 3 part series.
- Part 1: Amazon AWS configuration
- Part 2: Site Configuration and scripts
- Part 3: Automating it all with TeamCity
The Concept
When using Amazon Elastic Cloud Compute one of the powerful features that the EC2 (server management) API offers is the ability to create a new instance and have it run a PowerShell script on initialisation as part of Amazon’s initialisation scripting support called UserData. This script fires after the instance is first turned on and can be used to do anything you want written in batch or PowerShell 3, and delivers even more power because it runs your script as local Administrator allowing you to do pretty much anything you want.
Historically when we’ve talked about Continuous Integration and Deployment for your ASP.Net websites I’ve talked about the approach of continually deploying updates to your webserver.
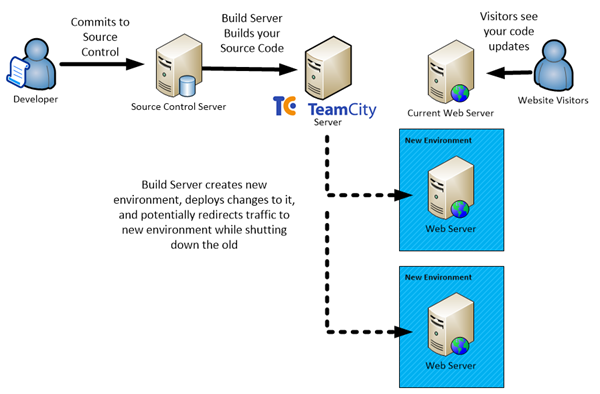
Taking this further a powerful extension of this is to use the infrastructure automation provided in services like Amazon’s EC2 or Windows Azure to automate your entire stack - all of a sudden instead of thinking about your code changes as atomic units, you can think of your entire technology stack (servers, network, load balancers etc.) as a deployable item, with its configuration in source control and a build server orchestrating the whole ecosystem.
This enables you to take a different approach that can almost appear backwards:
- Commit changes to source control.
- Build server creates a package and uploads it somewhere (i.e. S3).
- Build server asks Amazon to create a new server with a provided initialisation script.
- The new server launches and configures itself a new IIS site and any required software from the provided script.
- The new server then Download a web deploy package from S3.
- The new server then self-deploys the package to itself and lets you know the URL (or any other step – maybe adds itself to the load balancer).
You're not deploying the application to your server – you're deploying the server; with your application.
This can be great for staging and test environments, auto-scaling production deployments and much more.
As an example of how awesome this can be, we’re going to setup WebDeploy, TeamCity and some PowerShell magic to run a build, package and push to S3 and then initialise a self-configuring Amazon EC2 instance. By the end of this post, you should have the foundation to extend this even further with any automation ideas you might have.
While the sample we'll create will be pretty simple, it should show you the power of full stack automation.
This approach means that you are deploying to a new environment every time you push up changes – and potentially destroying any past deployment artefacts along the way (shared resources are usually kept separately in a central location like S3).
To relate this to anyone familiar with guerrilla warfare tactics, this is what I like to think is a DevOps equivalent to the military tactic known as Scorched Earth.
What you’ll need
- An Amazon AWS account with an API Key and Secret with rights to launch new Amazon EC2 Instances.
- Ability to create a new Amazon S3 bucket.
- A development box with the following installed:
- Visual Studio 2012
- Amazon .Net SDK
- PowerShell 3
- A build server with the following installed (these could be the same box if you're just wanting to test things out):
- TeamCity 8
- Windows 2008 R2+ or Windows 7+ box
- .Net 4.5
- Amazon .Net SDK
- PowerShell 3
- A source control server with a .Net web application project stored on it (I'll be using Git on Bitbucket, but will put the final code on Github).
Amazon Configuration
In order to get our deployment automation working we need a few things:
- An Amazon S3 Bucket with a folder within it correctly setup security configuration wise.
- A key pair for password encryption for the virtual machines.
- A security group for our new servers to be created within.
Log in to your Amazon AWS console.
Go to the Amazon EC2 Section of the console.
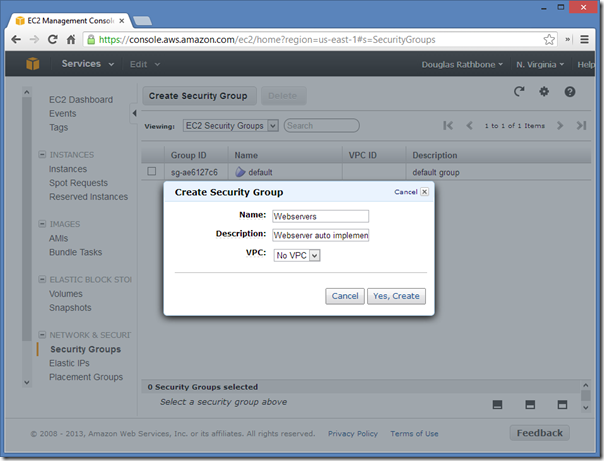
Open the "Security Groups" section in the left hand navigation, and create a new one.
This will be the firewall policy for all of the webservers we'll be creating using our PowerShell script - I've named mine "Webservers"
Now add a new rule to allow Http traffic from all IPs.
Now allow RDP in as well (I'm allowing all remote clients, but you really should limit this to your IP address or range if you know it).
Feel free to add any additional firewall rules that you feel are necessary for your application (maybe 443?). You can always change this later.
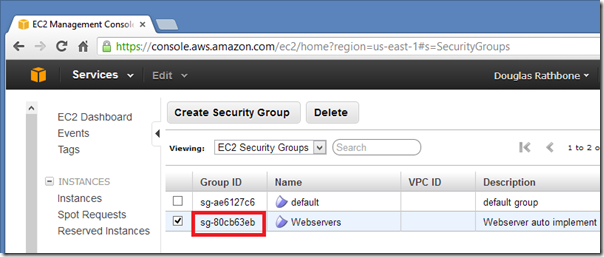
Now copy the security group ID for use later in our PowerShell script.
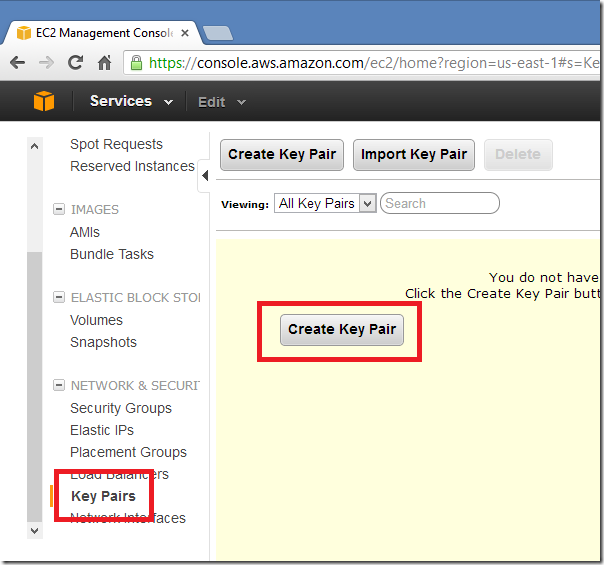
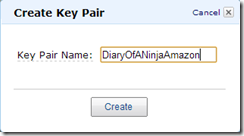
Now go the KeyPairs section of the EC2 Console and create a new keypair.
Save the key file in the /Automation folder. REMEMBER THIS FOR LATER AS YOU'LL NEED TO ENTER IT INTO PART 2 "LAUNCHNEWINSTANCE.PS1".
Now go to the Amazon S3 section of the console.
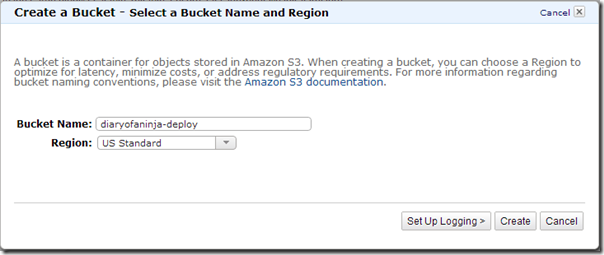
Create a new bucket in your region of choice (NOTE: make a note of this for later as it makes up part of the download url for your website package) – I've named mine "diaryofaninja-deploy"
Then when in the root of the S3 bucket press the Properties button on the top right and then press Add Bucket Policy link.
We're going to setup security for the bucket and only allow users who have a very specific user agent used in their request – we'll then use this in our server automation script to have the new server instance to download our web deploy package.
Paste the following policy into the text box (take special care to replace "[REPLACE WITH YOUR BUCKET NAME]" with the name of your S3 bucket:
{
    "Statement": [
      {
          "Effect": "Allow",
          "Principal": {
              "AWS": "*"
          },
          "Action": "s3:GetObject",
          "Resource": "arn:aws:s3:::[REPLACE WITH YOUR BUCKET NAME]/*",
          "Condition": {
              "StringEquals": {
                  "aws:UserAgent": "diaryofaninjadeploy-4d8ae3a6-6efc-40dc-9a7c-bb55284b10cc"
              }
          }
      }
    ]
}
This policy means that no one can download your bucket files unless they include the exact user agent we've specified in the request. It's not a secure username and password combo, but if you use a long enough user agent string as a key you limit the risk of evil doers downloading your website packages, while also excluding people scanning S3 servers for file lists.
Apply this policy by saving it.
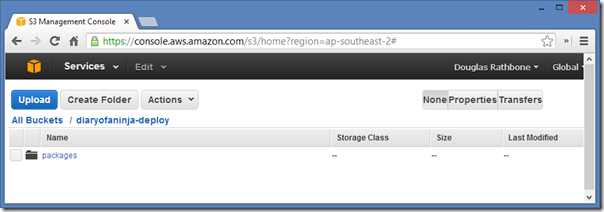
Now create a folder called "packages" within your S3 bucket. This is where we'll get TeamCity to upload the latest copy of our applications web deploy package using PowerShell scripts and the Amazon PowerShell API.
Now move onto Part 2 – website and scripting configuration.





Comments