Adding Accessibility to a website for access by sight or hearing impaired users is a thought that many developers have post build. Along with this, when you’re tasked with the job of building an accessible website, Visual Studio probably wouldn’t initially be a tool that comes to mind, but Visual Studio has everyone fooled on this topic as it has this functionality covered, you just need to look a little below the surface.
 Accessibility?
The World Wide Web Consortium is an international community that develops standards for the internet. A part of this entails building standards on accessibility, so that hearing and sight impaired users can enjoy the internet just as much everyone else (LOL cats included). Making your website accessible should be considered best practice, in the same way that placing wheelchair access at a public venue is, and seeing i feel the internet should be probably be more accessible that any physical venues, taking the time the implement these standards definitely helps work towards this goal.
The smart people at the W3C have come up with a great set of guidelines that are referred to as the WCAG. These checklists give developers an easy way to make sure the site they are building is accessible.
There are two progressive levels of accessibility in the WCAG checklist from the W3C, marked as Priority 1 and Priority 2. With these staged checklists is becomes easier to implement a staged roll out of accessibility to a site. Even with these checklists, when building large sites with hundreds of pages, the job of checking each item off against your encyclopaedia of pages can be hard to stomach.
This very need has lead to the creation of many different tools to help you scan your site to validate it against these lists – Visual Studio is one of these tools thanks to a nifty little feature that, though not many developers know it, allows you to check your site against the WCAG list without having to leave your favourite IDE.
Shut up and show me already…
The Visual Studio tool I show you below can be used in a couple of different ways. A lot of people use this tool on ASP.Net pages before they publish their website. I suggest against this and instead suggest you cut & paste out of the actual output of your page as there can be differences that you miss when validating against a pre-run time page.
Load the page you want to validate against the WCAG lists in your favourite web browser.
Conduct the usual View Source in your browser of your page and copy the source code to the clipboard.
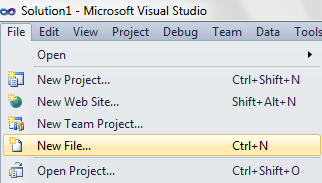
Open Visual Studio and Select File > New File
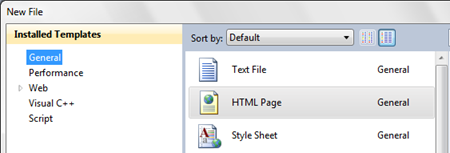
Select HTML Page and click OK
Open the Source View of the new HTML page in Visual Studio
Paste the source code that you copied above in your web browser into the source code of your new HTML page
(Now comes the secret)
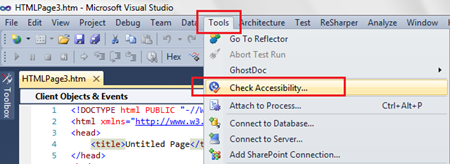
Select Tools > Check Accessibility to open the WCAG checker
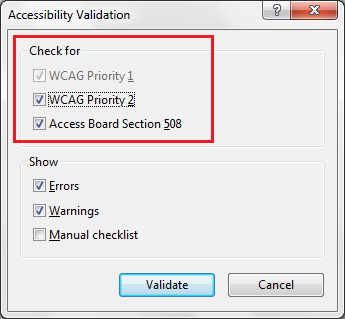
Now select all the Priority items you want to validate the page against and click Validate
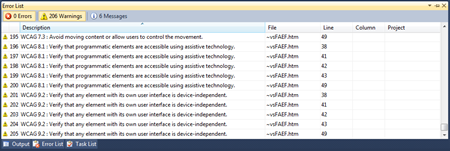
In the Error and Warning pane at the bottom of your IDE pane you can review all the WCAG Priority exceptions individually. Clicking on one of the items will take you to the exception in your page’s HTML.
(If you have moved this pane somewhere else on the screen you’ll have to refer to it at your new location instead).
Too easy!
Comments