Team Foundation Server has some notoriety when it comes to administering security. When it comes to giving a client or remote user access to enter work items and bugs only, wading through the quagmire of MSDN can make it seem impossible. I’ll show you a quick direct path to giving a client remote access.
 Team Foundation Server 2010 offers so many great new features and additions on the previous release. Couple this with the fact that it’s released as part of MSDN and more people seem to be dipping their toes in that ever. This makes it even more important to learn the black arts of the beast to successfully administer it for developer and client folk alike. Let’s take a look.
How to make it happen
- Create a local windows user group to store all work item only view users. For this demo I’ve called mine “TFS CLIENT REMOTE ACCESS”
- Create a new user for your client. For the purposes of this demo I'll call mine “tfs_client1”
- Add the user you just created to the windows user group “TFS CLIENT REMOTE ACCESS” you just created
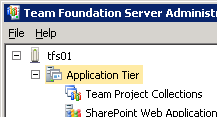
- On your TFS server open Team Foundation Server Administration Console
- Open the Application Tier Tab
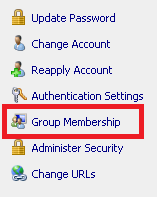
- Click the link marked “Group Membership”
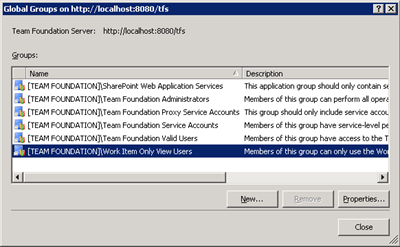
- Select the group marked [TEAM FOUNDATION]\Work Item Only View Users and click Properties
- Select the “Windows User or Group” radio button and then click add

- Enter your newly created local user group above.
- ie [YOUR TFS SERVER NAME]\TFS CLIENT REMOTE ACCESS
- Click OK twice to save out of the group properties (after clicking OK once, you should see below)

- Now in Team Explorer or Visual Studio 2010 right click on your TFS project in the Team Explorer view on the right hand side of the screen and select Team Project Settings and then select Group Membership
- Select [Your ProjectName]\Contributors and click the properties button
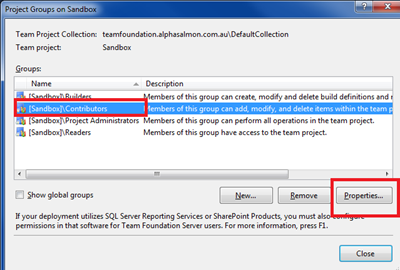
- In the next screen select the radio button marked “Team Foundation Server Group” and click the Add button
- Scroll down until you find the [Team Foundation]\Work Item Only View Users and click OK
- Click OK twice to save out and your done!
Now when clients or remote users try to login to your TFS web view using the account we just setup, they’ll only have work item only view. The great thing about this is that they can only see work items and bugs that they have created. So all that internal chatter from your project managers etc, never gets seen by the client.
Taking it one step further
So if your organisation is like mine, you have multiple projects and multiple clients. In this case you don’t want all clients to have access to all projects, and this is what the above solution offers. What we want to do is take it one step more and make security more granular. We want to create a new work item view group for your client, add your user and give that work item view group access to your project.
- Create a new windows user for your client as above
- On your TFS server open Team Foundation Server Administration Console
- Open the Application Tier Tab

- Click the link marked “Group Membership”

- Click on New
- Enter a name for your group. I’ve called mine Work Item Only View Users – Client A
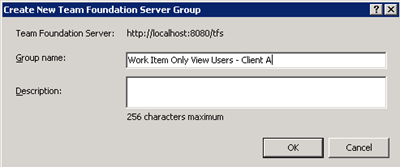
- Click OK
- Now select the group you have just created and click Properties to show a list of users in this TFS group (there should be none yet)
- Select the radio button that says “Windows User or Group” and click Add

- Enter the local user you have created for your client and click OK twice to accept and close out.
- Click on the Administer Security link in the TFS Admin console

- Select the Team Foundation Server Group you created in step 6 and click Add to add the TFS user group to the server settings
- Select your newly created group and click Properties
- Select your newly created group from the list and un tick everything but the Deny box on “Use full Web Access” in the bottom security list and click close

- Now follow on from Point 12 in the first walk-through but instead of adding “Work Item Only View Users” add your newly created group “Work Item Only View Users – Client A” instead
- Now you’re done! Your newly created user will only have access to the project in TFS that you have allowed them access to.
Comments